All Beauty that has not a foundation in use soon grows distasteful and needs continual replacement.
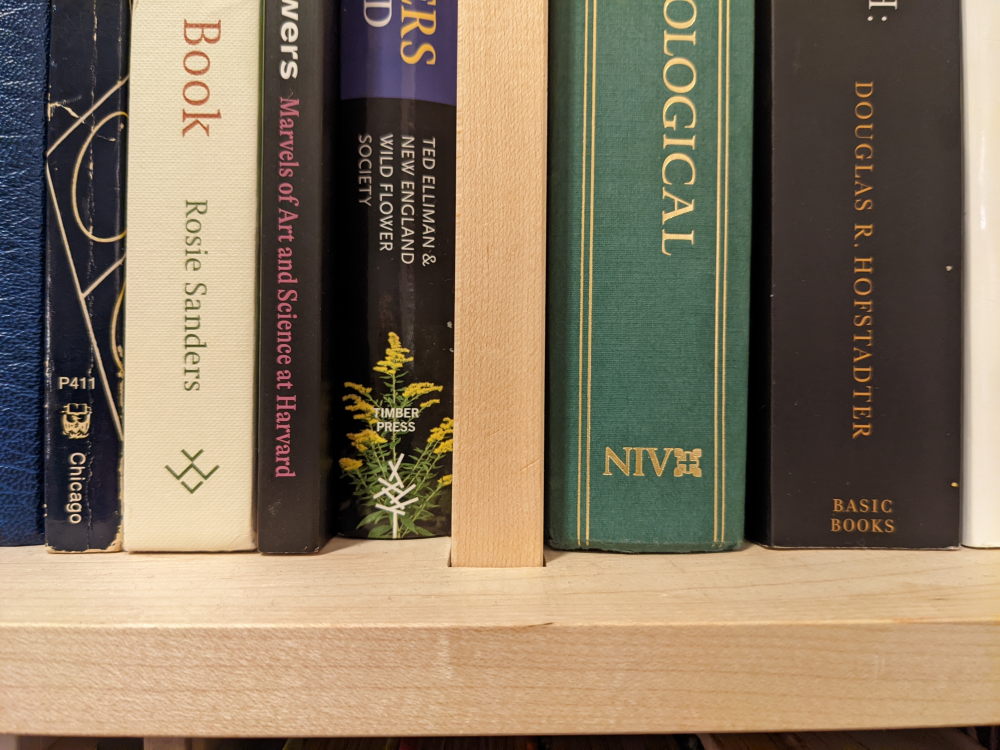
Our household overflows with books. There is a monthly budget set aside to spend on (mostly used) books. As a result, books are always trickling in through the post, and they pile up everywhere. Like other people with similar mindsets and purchasing habits, we are always short on bookshelf space.
My wife loves the clean lines and airiness of mid-century modern design. The bookshelf was to have an open-back and no ornamentation (she does not at all share my love of Doric columns, entabulatures, capitals, and etc.) The wood selected was maple for its light color and relative strength.
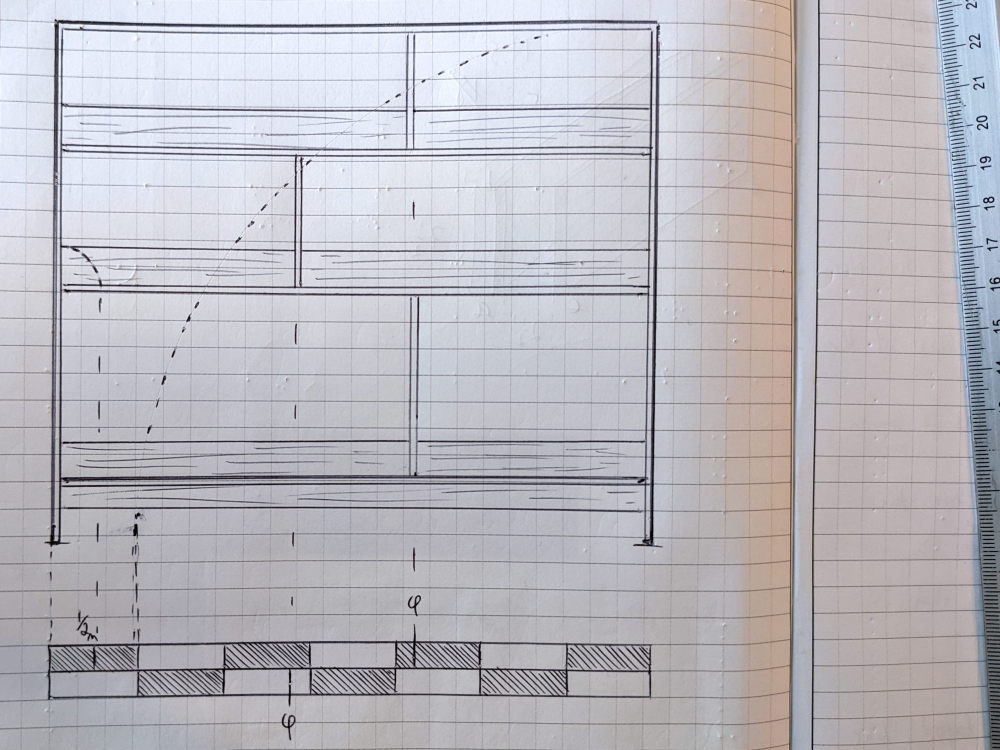
The depth of the bookshelf and the heights of each shelf were determined by the dimensions of the books we have. Anyone with a significant library can appreciate that book sizes vary widely. We decided on 12" of depth with three shelves of 13", 11", and 9". The height was set at 41" for ergonomic reasons and the aesthetic demands of the room. To determine the length we used the unit ratio closest to the desired length. So if the length is 7 units (module), the height would be 6. If you happen to be wondering what is all this about unit ratios and modules, have a look at Jim Tolpin & George Walker's work on design. For people like me, who can't design their way out of a moist paper bag, Jim and George are a great help.
The position of the uprights was determined in a similar vein, being the golden ratio, or Φ of the length. I am well aware that there are some COUGH-Christopher-Schwarz-COUGH who scoff at the use and abuse of Φ in design. But seeing as the ratio shows up in places such as our bodies, spiral galaxies, all over the plant world, and the design of the ark of the covenant, then perhaps there is something to it. Chris shouldn't complain though, since this bookshelf will likely house several of his books.
After the design was complete I had the pleasant task of figuring out the joinery. This is a indeed pleasant task because drawing different wood joints in a notebook (with a cup of coffee and a piece of toast close to hand) is a lot easier than woodworking. In my drawings all of the edges are crisp and there are never any splits, warped wood, or contrary grain.
I calculated to the amount of wood needed for two bookshelves and visited the local hardwood lumber yard. I got the required wood, most of it from the same log, and had it delivered long to the house. There I started the careful process of examining each board and assigning portions of boards to specific parts of the bookshelf. Impressively wavy, tiger striped, or birds-eye grain goes on top, while the difficult faces will forever face down and will likely never be seen by anyone except for the occasional toddler making their way across the room while looking for handholds.
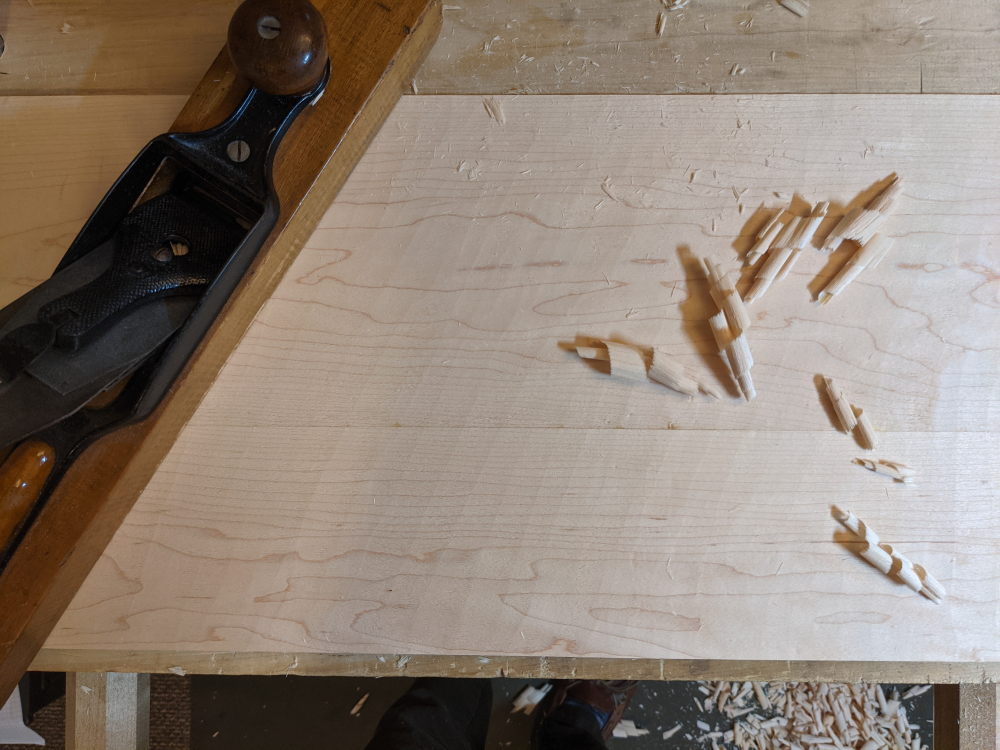
Finally, actual work starts with boards being cut to size and jointed. I use my No. 7 plane to joint the boards together. I then flatten the boards with a No. 40½ plane fitted with a scrub iron, which is to say, just an old plane iron into which I've ground a gentle, sweeping radius. When scrubbing the boards flat I'll draw a thick pencil line from one end to the other, then erase that line with the plane to make sure I haven't skipped anywhere. The show faces will get further flattened across and diagonally to the grain with my No. 7 plane, then smoothed. But faces such as shelf bottoms will be left with the lovely undulating pattern of the scrub plane.
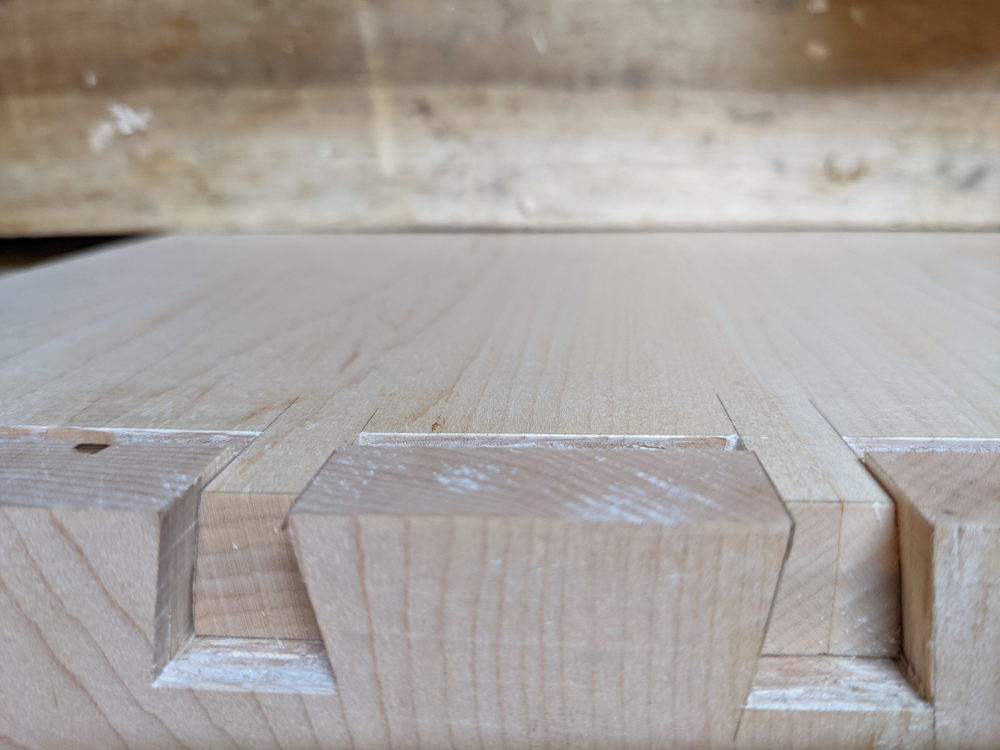
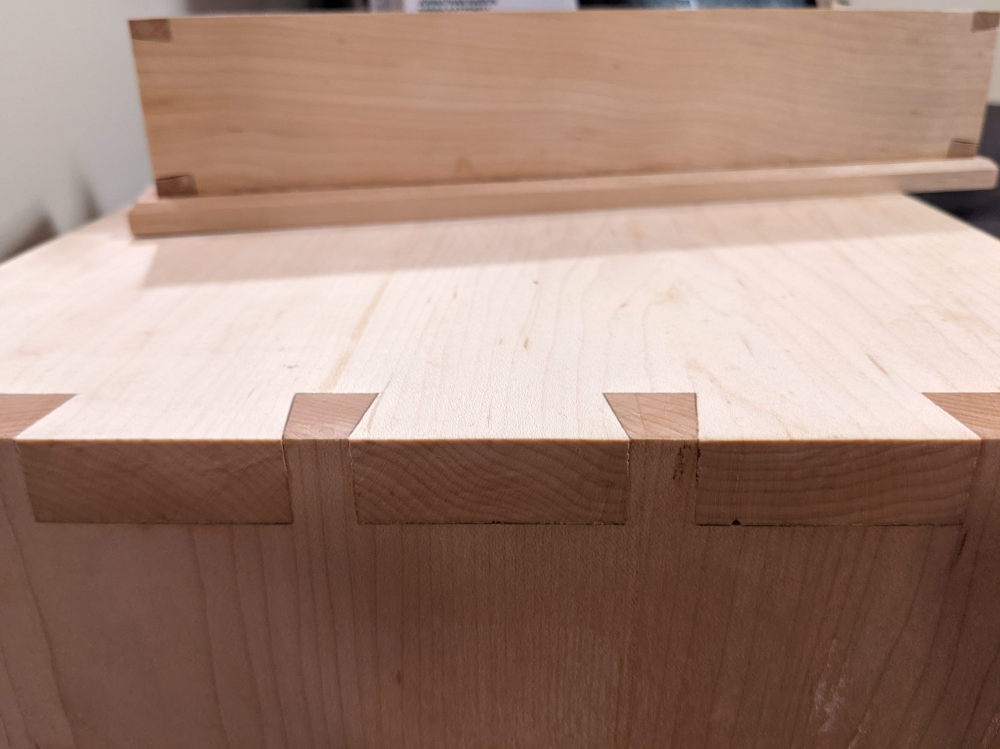
The dovetails between the top and sides are next. The number of dovetails and their angles are based primarily on aesthetics. I choose an odd number because I like the look of having a dovetail in the center. Cutting dovetails in maple is a pleasure. However, working in wood as hard as maple means that I need to stop and sharpen my tools more often.
I tend to make my dovetails too tight. With maple this is creates a danger of splitting the work if you force the dovetails into place; maple doesn't give. This has driven me to improve my dovetail technique and to introduce some subtle changes. I will often remove wood from the inside of the tail sides away from the show edges, or undercut on the inside between the pins.
Unfortunately, I've also found that there is no secret to cutting nice-looking dovetails. It is the straightforward and mundane matter of cutting hundreds of them.
When the dovetails at the top are done, it is then time to spend time at the bottom. The sides get cut at the bottom to make feet since furniture sitting flat on the floor looks awful and slides around. A sturdy joint is needed at the bottom as a counterpart to the dovetailed top. In many classic bookshelves which have dovetail construction, the bottom would be dovetailed as well, and then the carcass would be placed on legs. I chose instead two rails joined to the sides with draw-bored mortise and tenons.
Visually, the rails are recessed to catch the shadow cast by the
bottom shelf, and they also look like the kick
people are used to see at the bottom of a bookshelf. I've built
a number of bookshelves with this design, and I've cut
through-mortises on some for the rail. However, on others I've
cut the mortises just shy of breaking through to the other
side. It is a matter of how busy you want the outside of the
bookshelf to look.
Structurally, the rails help keep the sides of the bookshelves together (but we don't rely on that) and because they are 2" wide pieces of maple they do a perfect job of supporting the weight of the bottom shelf, which slides into place directly above the rails.
I scribble a lot on my woodwork. This becomes especially temping when working with light maple. I'll remove most of it with a smoothing plane right at the end of the project, but I also have no problem with leaving marks and notes in places which are obviously hidden. Anyone looking underneath and in between the bottom rails of this bookshelf (any many others) will find unfinished surfaces and scribbled notes.
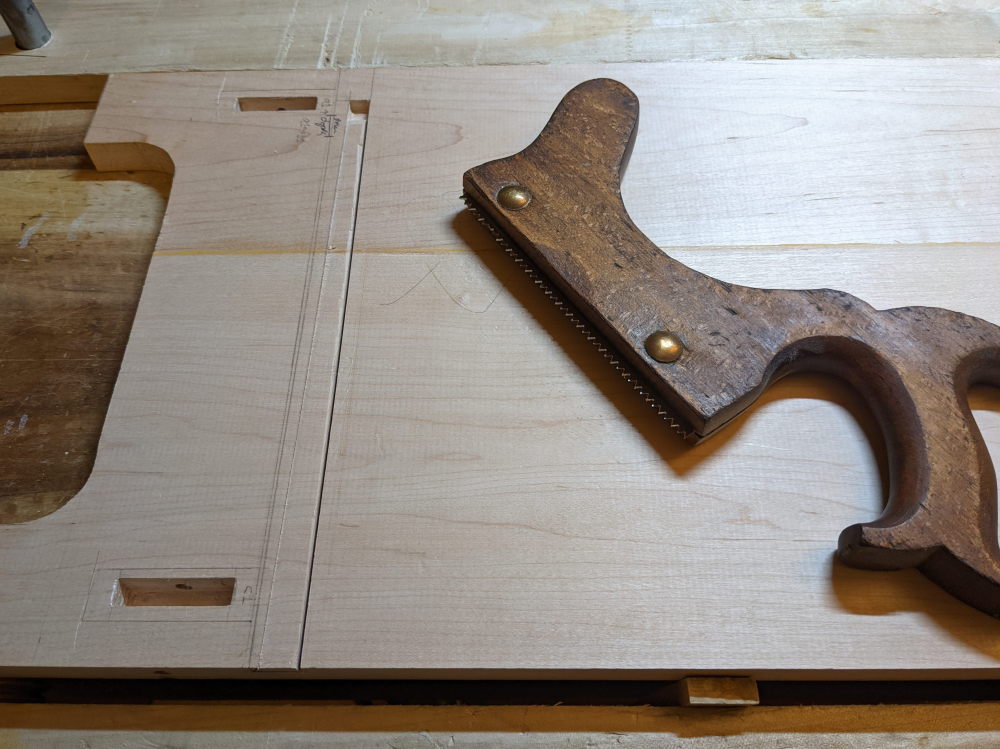
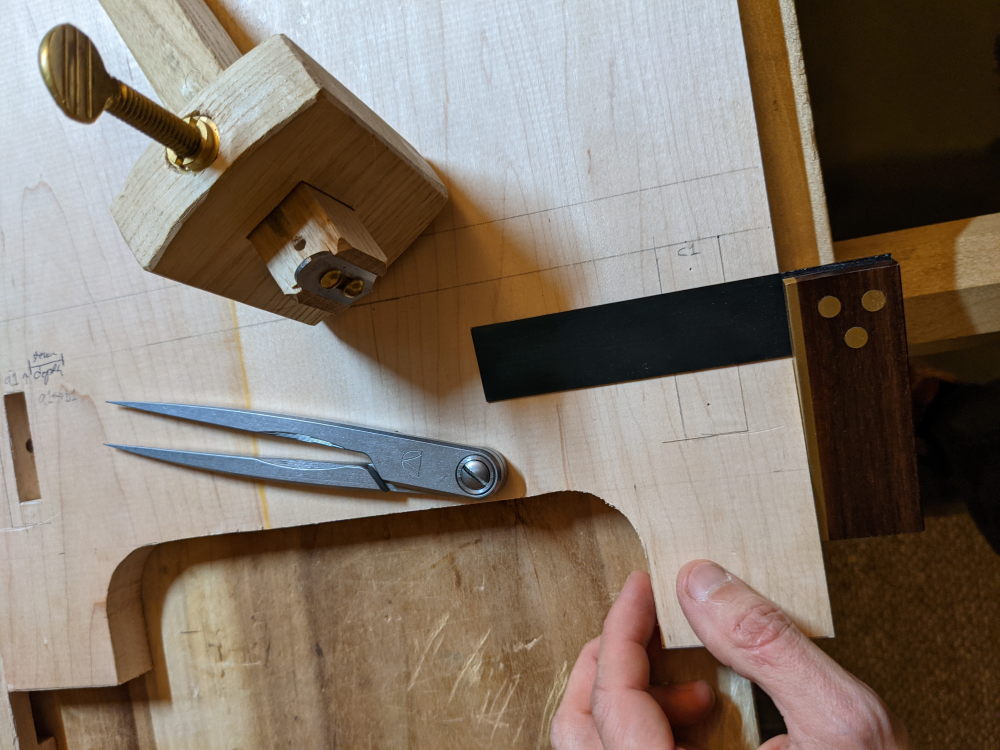
The bottom shelf is held in place by a stopped, tapered, dovetailed dado. Being stopped means that it looks nice and clean from the front. Being tapered means that it is humanly possible to fit the joint tightly, and being dovetailed means that it is tenacious. Once this joint is tapped into place with a mallet the entire bookshelf feels solid despite having an open back.
However, it is a tricky joint to cut and requires careful attention. I cut the dado first, tapering down from 1 eighth of an inch at the back to 2 eighths at the stop. I use a stair saw to comfortably cut down to depth on the straight side.
I decided on a dovetail slope of 1:7 because I like the number seven, and it looks about right. I clarify this lest you look at the joint and get the misguided idea that there was any kind of deliberate and rational thinking involved. I cut a relief at the stop-end to collect sawdust and then make the dovetail cut using a saw guided by an angled block of wood. Here it helps to make a small mark on the saw indicating the desired depth because it is slow going and easy to undercut.
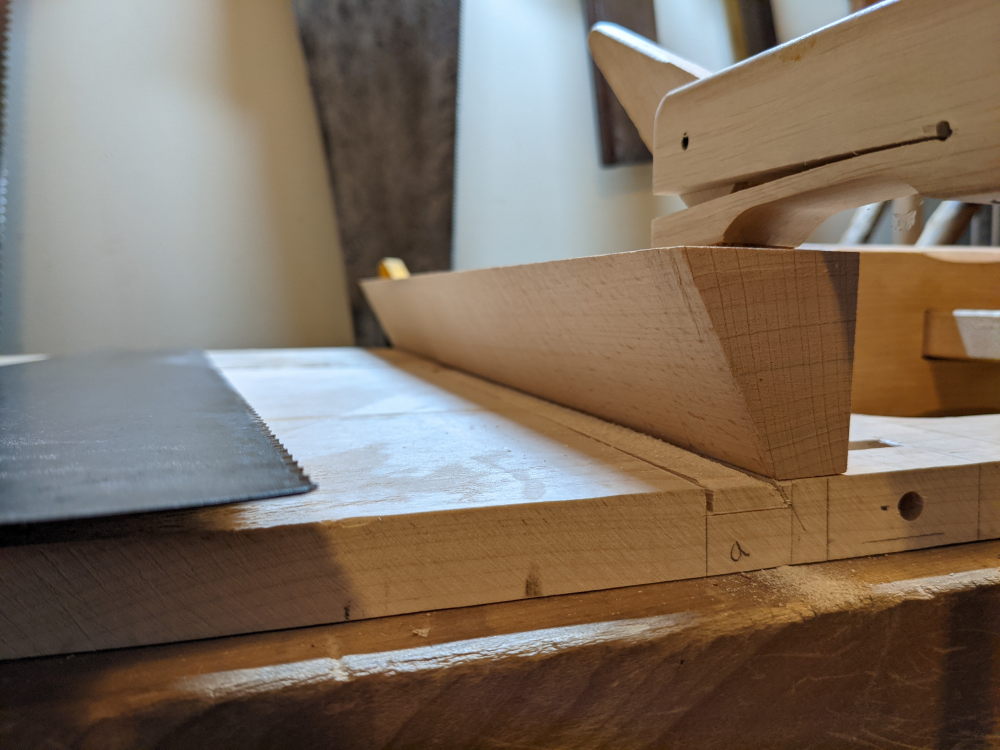
To cut the matching dovetail on the shelf I first make a sloped rebate then saw down below that rebate another ⅛". I start cutting the slope with a chisel to get it rid of most of the waste. I use a side rabbet plane with a modified fence (glued wooden wedge) to finish the slope.
The other shelves fit into stopped dados, which are a breeze to cut in comparison to dovetailed dados. However, recall that this bookshelf has an open back, and therefore the shelves which are simply sitting in stopped dados do nothing to support the sides. We solve this problem along with providing something to stop books from falling out the back by dovetailing cross-rails into the sides on the back above each shelf.
Each shelf has an upright support to transfer weight on down from the shelf above and combat sag. The dados for the supports stop about 1½" from the front. Visually, this makes the supports disappear in between the books; you have to look with intention in order to find them. This marriage of form and function becomes necessity when the design is spare.
In the final stages of the project I clean each piece with a freshly sharpened smoothing plane (and card scraper if needed). The corners of the pieces are so crisp as to be razor sharp, and need to be lightly rounded over by a passing block plane.
Final assembly comes next with a few spots of hide glue where needed. However, the shelf remains free of metal fasteners and mostly free of glue. There is an indication you get as to the solidity of a piece as you gently (and sometimes not-so-gently) tap the dovetails into their final place. The sound of the mallet changes, and it is that sound which tells you that there is no longer any give.
This is also the time to take that smoothing plane and go over the dovetails so that the tails are flush with the pins. To the untrained eye it ends up looking like you've done a marvelously precise work. But we woodworkers are great at shooting our arrow first, then painting a target around it.
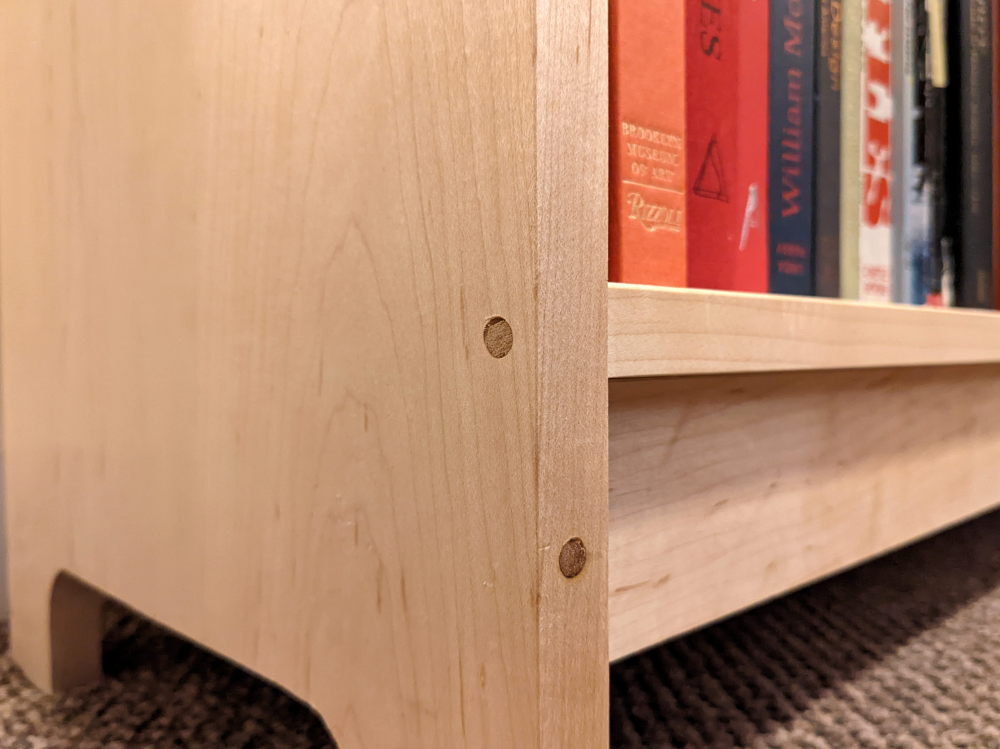
The shelves will expand and contract with time as the wood moves, but we want them to remain flush with the front of the bookshelf. The shelves have dowels fixing them to the front so that any expansion happens out towards the back just like in classic drawer construction. I've typically used contrasting wood for the dowels, such as cherry on a maple bookshelf, but it is equally possible to choose an identical wood and make these dowels all but invisible.
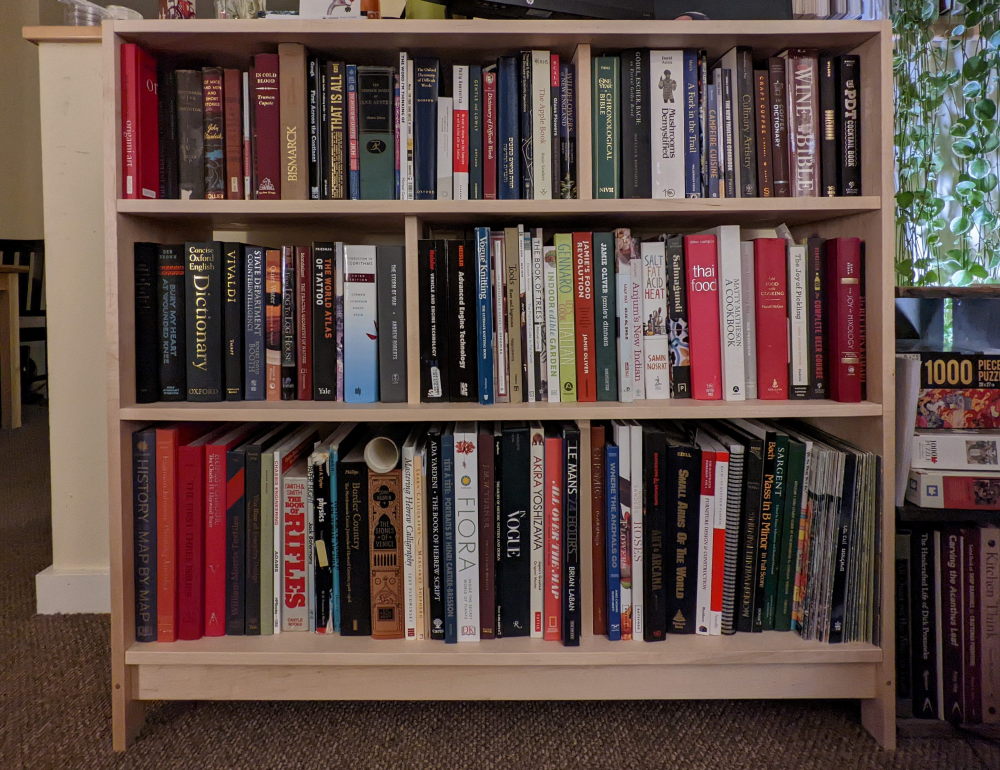
The final step is to give the piece a coat or two of tung oil to bring out a warm glow from the smoothed surfaces and deepen the color of the edge grain on the dovetails. However, after the books are all loaded onto the bookshelf there isn't much time to grab a book and read, because there are more books in the post, and I probably should be headed back into the workshop to make another bookshelf.